The Steam Deck is a new handheld gaming device that was recently released by Valve Corporation. It is designed to allow gamers to play their favorite PC games on the go, using the power of a custom APU and a 7-inch touchscreen display. However, while the handheld form factor is great for portability, some gamers might prefer a larger screen and a more comfortable viewing experience. This is where connecting your Steam Deck to your TV can be handy.
Connect Steam Deck to TV lets you enjoy your favorite games on a larger screen with better resolution and sound quality. This can be especially useful for games that benefit from a larger display, such as strategy games or first-person shooters. In this article, we will provide a step-by-step guide on how to connect your Steam Deck to your TV, as well as some tips and troubleshooting advice to help you get the most out of your gaming experience.
Requirements to Connect Steam Deck to TV
To connect your Steam Deck to your TV, you will need the following:
- Steam Deck
Of course, you will need a Steam Deck handheld device to connect steam to TV. The Steam Deck runs on the SteamOS operating system and comes equipped with a custom APU, allowing it to play most PC games.
- TV
You will also need a TV with an HDMI input. The HDMI input is necessary to connect the Steam Deck to the TV and display the game on the larger screen. The TV should also be compatible with the resolution and refresh rate of the Steam Deck.
- HDMI Cable
An HDMI cable is necessary to connect the Steam Deck to the TV. The cable should be long enough to connect the two devices, but not so long that it causes signal degradation.
- USB-C to HDMI Adapter (If Necessary)
If your TV does not have an HDMI input, or if you prefer to use a USB-C port instead, you may need to purchase a USB-C to HDMI adapter. This adapter will allow you to connect the Steam Deck to the TV via the USB-C port, instead of the HDMI port.
- Bluetooth controller or keyboard and mouse
To play games on your Steam Deck while it is connected to your TV, you will need a controller or keyboard and mouse. A Bluetooth controller is a good choice, as it allows you to play games from a comfortable distance. However, if you prefer, you can also connect a wired controller, keyboard, or mouse directly to the Steam Deck.
Step-By-Step Process to Connect Steam Deck to TV
1. Check TV compatibility
Before you connect Steam Deck to your TV, you should ensure that your TV is compatible with the device. Connecting your Steam Deck to a TV that’s prone to TV overheating can be risky, as prolonged use of both devices may cause damage to the TV and the Steam Deck. There are two important factors to consider: HDMI input requirement and resolution compatibility.
HDMI input requirement
The first thing to check is whether your TV has an HDMI input. Most modern TVs have at least one HDMI input, but if your TV is older, it may not have this feature. Without an HDMI input, you will not be able to connect the Steam Deck to your TV.
Resolution Compatibility
Another important factor to consider is resolution compatibility. The Steam Deck has a 1280 x 800 resolution, so you will want to make sure that your TV can display this resolution properly. Some older TVs may not support this resolution, so be sure to check the specifications of your TV before attempting to connect the two devices.
In addition, you should also check the refresh rate of your TV, as this can affect the overall gaming experience. The Steam Deck has a refresh rate of 60Hz, so you will want to make sure that your TV can display this refresh rate properly as well.
By checking your TV’s HDMI input and resolution compatibility, you can ensure that you have the best possible gaming experience when connecting your Steam Deck to your TV.
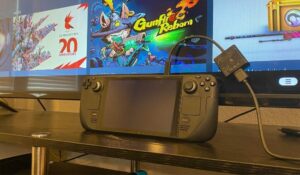
2. Connect Steam Deck to TV
There are two options for connecting your Steam Deck to your TV: using an HDMI cable connection or a USB-C to HDMI adapter connection.
Option 1: HDMI cable connection
To connect Steam Deck to TV using an HDMI cable connection, follow these steps:
- Connect one end of the HDMI cable to the HDMI port on the Steam Deck.
- Connect the other end of the HDMI cable to the HDMI port on your TV.
- Use your TV’s remote to select the correct HDMI input for the Steam Deck.
- The Steam Deck should now be displayed on your TV screen.
Option 2: USB-C to HDMI adapter connection
If your TV does not have an HDMI input or if you prefer to use a USB-C port instead, you can connect your Steam Deck to your TV using a USB-C to an HDMI adapter. To do this, follow these steps:
- Connect the USB-C end of the adapter to the USB-C port on the Steam Deck.
- Connect the HDMI end of the adapter to the HDMI port on your TV.
- Use your TV’s remote to select the correct HDMI input for the Steam Deck.
- The Steam Deck should now be displayed on your TV screen.
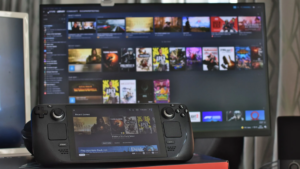
3. Configure display settings
After connecting your Steam Deck to your TV, you may want to adjust the display settings to optimize the picture quality. Here are the key settings to consider:
Resolution
The resolution setting determines the number of pixels displayed on the screen. To adjust the resolution on your Steam Deck, follow these steps:
- Go to the Steam Deck’s home screen.
- Tap the Settings icon.
- Select the Display option.
- Choose the resolution that matches your TV’s specifications.
Refresh rate
The refresh rate setting determines how often the screen updates with new information. To adjust the refresh rate on your Steam Deck, follow these steps:
- Go to the Steam Deck’s home screen.
- Tap the Settings icon.
- Select the Display option.
- Choose the refresh rate that matches your TV’s specifications.
Overscan
Overscan is a setting that adjusts the size of the display to fit your TV screen. If your TV has a black border around the edges of the screen, you may need to adjust the overscan setting. To do this, follow these steps:
- Go to the Steam Deck’s home screen.
- Tap the Settings icon.
- Select the Display option.
- Choose the Overscan option.
- Adjust the slider until the picture fills the entire screen.
By adjusting these display settings, you can ensure that your Steam Deck is displaying on your TV screen in the best possible quality.
4. Connect the audio
There are three options for connecting audio to your Steam Deck and TV: using HDMI audio, Bluetooth audio, or an audio jack.
Option 1: HDMI audio
If your TV has built-in speakers or a soundbar connected via HDMI, you can use HDMI audio to play sound from your Steam Deck on your TV. To enable HDMI audio, follow these steps:
- Go to the Steam Deck’s home screen.
- Tap the Settings icon.
- Select the Audio option.
- Choose HDMI as the output device.
Option 2: Bluetooth audio
If you have a Bluetooth speaker or soundbar, you can connect it to your Steam Deck to play audio wirelessly. To do this, follow these steps:
- Put your Bluetooth speaker or soundbar into pairing mode.
- Go to the Steam Deck’s home screen.
- Tap the Settings icon.
- Select the Bluetooth option.
- Choose your Bluetooth speaker or soundbar from the list of available devices.
Option 3: Audio jack
If you have a pair of wired headphones or speakers, you can connect them to your Steam Deck using the audio jack. To do this, follow these steps:
- Plug the audio jack into the headphone jack on the Steam Deck.
- Plug the other end of the audio jack into your headphones or speakers.
- Adjust the volume on your headphones or speakers to the desired level.
By following these steps, you can ensure that your Steam Deck is playing audio through your desired output device.
5. Configure audio settings
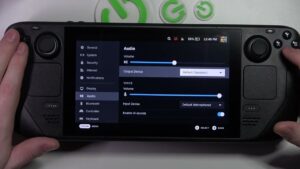
After connecting your audio device to your Steam Deck, you may want to adjust the audio settings to optimize the sound quality. Here are the key settings to consider:
Volume control
The volume control setting determines the level of audio output. To adjust the volume on your Steam Deck, follow these steps:
- Go to the Steam Deck’s home screen.
- Tap the Settings icon.
- Select the Audio option.
- Adjust the volume slider to the desired level.
Audio output
The audio output setting determines which device the audio is played through. To adjust the audio output on your Steam Deck, follow these steps:
- Go to the Steam Deck’s home screen.
- Tap the Settings icon.
- Select the Audio option.
- Choose your desired audio output device.
6. Connect Controllers or Keyboard and Mouse
To play games on your Steam Deck while it’s connected to your TV, you can connect a controller or a keyboard and mouse. Here are the key steps to follow:
Bluetooth controller pairing
If you have a Bluetooth controller, you can pair it with your Steam Deck to play games wirelessly. To do this, follow these steps:
- Put your Bluetooth controller into pairing mode.
- Go to the Steam Deck’s home screen.
- Tap the Settings icon.
- Select the Bluetooth option.
- Choose your Bluetooth controller from the list of available devices.
Wired controller connection
If you have a wired controller, you can connect it to your Steam Deck using a USB cable. To do this, follow these steps:
- Plug the USB cable into your controller.
- Plug the other end of the USB cable into the USB port on the Steam Deck.
- Your controller should automatically be recognized by the Steam Deck.
Keyboard and mouse connection
If you prefer to play games with a keyboard and mouse, you can connect them to your Steam Deck using a USB cable. To do this, follow these steps:
- Plug the USB cable into your keyboard or mouse.
- Plug the other end of the USB cable into the USB port on the Steam Deck.
- Your keyboard and mouse should automatically be recognized by the Steam Deck.
By following these steps, you can connect your preferred input device to your Steam Deck and start playing games on your TV.
Troubleshooting
If you encounter any issues while connecting your Steam Deck to your TV or playing games, here are some common issues and troubleshooting tips:
Display issues
If you’re having issues with the display on your TV, here are some steps to try:
- Check that your TV is set to the correct HDMI input.
- Check that your HDMI cable is properly connected to your Steam Deck and your TV.
- Check that your TV supports the resolution and refresh rate that you have selected on your Steam Deck.
- Adjust the overscan settings on your TV if necessary.
Audio issues
If you’re having issues with the audio on your TV, here are some steps to try:
- Check that your audio device is properly connected to your Steam Deck and your TV.
- Adjust the volume settings on your Steam Deck and your TV.
- Make sure that your audio output device is set correctly on your Steam Deck.
- Try connecting a different audio device to your Steam Deck to see if the issue is with the device itself.
Controller issues
If you’re having issues with your controller, here are some steps to try:
- Check that your controller is properly connected to your Steam Deck.
- Make sure that your controller is supported by Steam and that you have the necessary drivers installed.
- Check that your controller is charged or has fresh batteries.
- Try connecting a different controller to your Steam Deck to see if the issue is with the controller itself.
Connectivity issues
If you’re having issues with connectivity, such as your Steam Deck losing connection to your TV or audio device, or if your TV is not connected to internet so, here are some steps to try:
- Check that your devices are all properly connected and that the cables are secure.
- Move your devices closer together to ensure a stronger signal.
- Try restarting your Steam Deck and your TV.
- Check for any firmware updates for your Steam Deck or your TV.
If you continue to experience issues, you can refer to the Steam Deck user manual or visit the Steam Support website for further troubleshooting assistance.
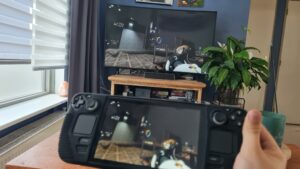
Conclusion
Connecting your Steam Deck to your TV can provide a more immersive gaming experience, allowing you to play games on a larger screen with improved audio and input options. By following the steps outlined in this article and troubleshooting any issues that arise, you can easily connect Steam Deck to TV and start enjoying your favorite games.
Frequently Asked Questions (FAQs)
Here are some common questions and answers about connecting your Steam Deck to your TV:
Q: Do I need a specific type of TV to connect my Steam Deck?
A: Your TV should have an HDMI input to connect your Steam Deck. Additionally, your TV should support the resolution and refresh rate that you plan to use with your Steam Deck.
Q: Do I need a specific type of controller to use with my Steam Deck on my TV?
A: You can use a variety of controllers with your Steam Deck, including Bluetooth controllers or wired controllers that can connect to your Steam Deck’s USB-C port.
Q: Can I connect my Steam Deck to multiple TVs?
A: Yes, you can connect your Steam Deck to multiple TVs as long as you have the necessary cables and adapters.
Q: Can I use my TV speakers for audio when playing games on my Steam Deck?
A: Yes, you can use your TV speakers for audio. Simply connect your Steam Deck to your TV using an HDMI cable and select your TV as the audio output device on your Steam Deck.
Q: How do I troubleshoot connectivity issues?
A: If you’re experiencing connectivity issues, try restarting your Steam Deck and your TV, checking that your cables are securely connected, and ensuring that your devices are close enough to each other for a strong signal. You can also check for firmware updates for your devices and consult the Steam Deck user manual or Steam Support website for further troubleshooting tips.
Q: Can the Steam Deck be connected to a TV?
A: Yes, the Steam Deck can be connected to a TV using the USB-C port and a compatible adapter. This allows you to play your favorite games on a larger screen for a more immersive experience.